a few weeks ago my sister and I decided to work our way through the prompts
covered in the book "The Surface Treatment Workshop"
and already we are on week 3 which explores using aluminium foil ...
the sort of foil most of us have in our kitchen drawer
most of the prompts include embossing patterns into the foil first
before experimenting with colouring the foil
for the embossing part of the exercise I mainly used stencils
and textured surfaces found in my studio such as corrugated card and blister packs
the samples below were embossed with a seedhead stencil
and then coloured with acrylic inks
I only bought the three mixing colours of turquoise, magenta and yellow
and blended them on the foil to create these tones
the inks were quite runny so they don't work with all stencils
but they did sit quite nicely on this one which had enclosed patterns
below is another piece of foil textured with corrugated card, blister pack and leaf stencil
I applied black shoe polish to this one which achieved a lovely "vintage" tone as it dried
I rather like these tones and mixed patterns
in the sample below I embossed the foil with circles from a stencil
added a layer of pva glue, then, after the glue had dried I painted a seascape with acrylics
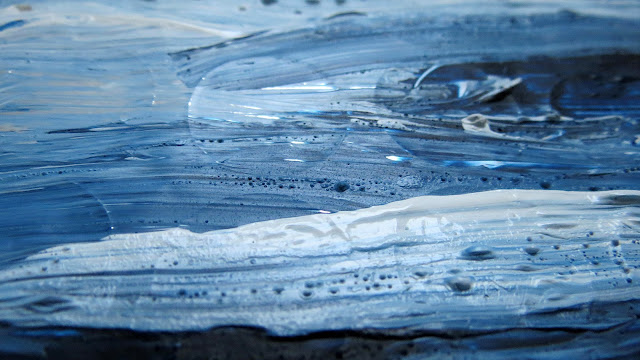
to help the drying process along I heated it with a heat gun which created tiny little texture bubbles
I noticed this was the pva glue bubbling and also the white acrylic, but not the blues
you can see the embossed circles coming through the paint
the close up detail below looks like seagulls and sea foam
(you have to use your imagination a little bit ...)
this is another sample below of the same process but without using the heat gun
and painting into the pva glue while it was still wet
the paint blended with the pva to create a feeling of movement in the seascape
(I definitely prefer this version)
this is the whole scene below ... a landscape
and a detail of the seascape with white sand beach, rolling waves and wintery sky
it's all I had time for this week as I also worked on covering my sketchbook
but I do have a couple more samples in progress which I hope to finish at the weekend
these are ... drawing and mark making on the reverse of the foil instead of embossing
and a 3D piece where I stuck some limpet shells down on a base
covered with aluminium foil to get the shell textures coming through
then I painted the shells white and just need to work more colours into the shells
***
in week 4 we are exploring mark making with masking tape
week 1 - stamping/printing
week 2 - stencils
week 3 - aluminium foil
week 4 - masking tape
my sister didn't enjoy using the foil this week but she did create a lovely original sample using
foil wrappers from stock cubes which she painted with acrylics and oil pastels x


11 comments:
WOW! These are really interesting...actually, some are beautiful!!!! Thanks for sharing!
I ,love this technique it is so beautiful when finished
Love Chrissie xx
All are so beautiful Carolyn but the seascapes are amazing. What an interesting technique mixing the pva glue and paint together.
You make me want to get back to mixed media work Carolyn. These are all fascinating.
Gosh Carolyn Theses are beautiful So atmospheric I love the seed heads too I like the idea of using limpet shell too I'll be looking out for the results! x
Carolyn, I love your experiments embossing, coloring & painting on foil. So inspiring!
I like these very much
Lovely embossed foil samples and a lovely seascape!
fascinating, and thanks for sharing, it gets my mind spinning ... very inspiring!! xoxo
As I read your post I was remembering some pictures my mother made when she was young - she painted in reverse on glass, leaving some areas clear, and then placed foil behind. The foil showed through the clear areas, making the picture sparkle. The one I remember was a parrot and looked amazing. Unfortunately it got broken over the years. AND - I was gob-smacked when I saw that you're sister and my mother share the same first name!
LOVE all your samples - beautiful seed heads. Happy weekend xo
Post a Comment