"I begin with an idea ... and then it becomes something else"
~ Picasso

Showing posts with label embossing. Show all posts

Wednesday, 12 July 2017

Surface Treatment Workshop - week 19

This week's workshop was about embossing.  I tried out Liquitex gloss gel, Golden molding paste and my favourite Daler texture paste.  It's always interesting to see how the products perform and compare.

I will share the Liquitex gloss gel first.  This is the product I used to make the "skins" a couple of weeks ago (it's a white gel medium that dries clear).  I spread it over two background pieces and left for about ten minutes each until the gel had just started to thicken and skin over.

On the first piece I pressed a piece of scrim into the gel to leave a pattern and then left it to dry again properly.  Once dry, acrylic paints and mica powders painted on top enhance the pattern.


Below, the same again but with a finer mesh pressed into the gel and then painted with paynes grey, black, shimmery silver and mink mica powders.


This was a really good product for embossing texture.  It worked so well that it was almost like I had applied a real scrim to the texture and embossing is most definitely the very next best thing.

The other really good property of Liquitex gloss gel is that, as it dries clear, layers beneath clearly show through.  I put this to the test on top of one of my prints from week 18.  I had originally monoprinted and then over printed with roller and bands.  So, on top of that I applied the gel and left for ten minutes to set, then pressed a piece of Carn pottery into the gel.  Lifted off the pottery piece, let the collage dry.  I didn't paint over the top because I liked the textured pattern with the collage showing through.


This is Golden molding paste.  Same as the gel above, it has to be applied and then left to almost set before textures can be pressed into the paste.


I pressed some pottery patterns into the paste and also etched some lines then heated with a heat gun before painting with pale blue and gold mica powders.  It made some lovely texture.


One more piece with the molding paste ... embossed, etched and then heated with a heat gun.


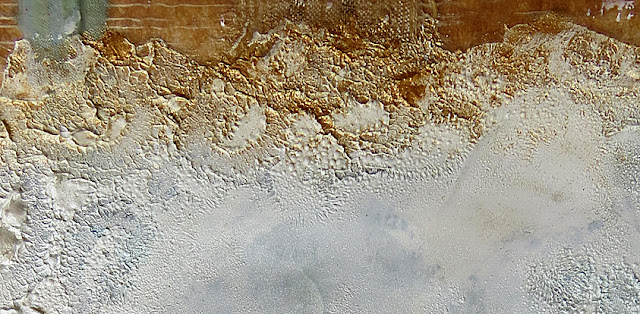
This one below is Daler texture paste embossed with lace and is probably my favourite.  On the left I used some soft cotton with a small patterned broderie anglaise edge and on the right some gold metallic lace with a larger lace patterned area.


Lots of potential with this technique for working on canvas, paper or fabric.  The next prompt is "glazes and final finishes" and I'm eagerly awaiting Evelyn’s update for weeks 18 and 19.  Her ideas are always interesting.

Meanwhile, I will be continuing with my new passion of eco dyeing, particularly on paper.  I had a go yesterday with moderate success, so will press on with experiments.  So far, I am getting strong blues and purples, some greens and browns.  I would really like to see some natural yellow, orange or pink coming through.

my first eco print on paper

Also, working hard on my Cornwall themed textiles which I'm not quite ready to share yet but I will be updating the website and facebook page generally for St. Ives Textiles very shortly.

Thank you for dropping by today x

Saturday, 25 February 2017

the mystery of indigo moons ...

back in November 2016 I attended a workshop on indigo dyeing
with maker Sarah Johnson at The Exchange Gallery in Penzance


before we got going with the dye...
Sarah gave us a short talk on the history of dyeing with indigo
a bit about the plant leaves and how to make up the dye bath ... "dos" and "don'ts"
and showed us various ways of creating patterns on cloth and paper with resists

to save time, Sarah had already made up the dye bath in preparation for the workshop
and kept it warm in a large vat so it was ready for us to use

here she is stirring the dye very carefully so as not to get too many air bubbles in it ...


I'm used to dyeing and experimenting with different methods using resists etc.
but I had never used a clamp as a resist before ...

a long strip of cotton fabric was folded concertina style and clamped together
before dipping in the indigo dye ... the longer you leave it in the vat the deeper the colour
(some people also use blocks or disks before clamping)

so ... now I know how all those perfect indigo moons are created that I see around the net


these are my indigo moons ...
and other cotton fabrics with folded, tied and waxed resists


resists with wax on cotton and paper


tied resists with elastic bands


squares created with pressure resist using wooden blocks and rubber bands


we each dyed a large pile of cotton fabrics and a calico bag to take our samples home in

I used all the techniques of folding, wax resist and tie dye resist to decorate my bag
dipping the bag in the dye at each resist stage


and this is the back of my bag ...


I lined the bag with greaseproof papers before applying the wax to the bag
and was rather pleased when I discovered that, not only did it serve it's purpose of
preventing the design on one side of the bag ruining the design on the other side,
but also had the potential to take the dye itself ...

so I experimented with creating waxed indigo patterns on the greaseproof paper ...


it was a fun, playful day with friends
we all went home happy with beautiful bags full of useful samples
that will come out one day for just the right project

at the moment ... I'm enjoying having them hanging up in my studio for inspiration


back to the Surface Treatment Workshop ...
I've finished up my samples (pretty much) working with aluminium foil
just to prove to myself that the last samples weren't a "fluke"
I painted another seascape on the foil using the pva glue and acrylics

I think I like this one even more ...
for the crackle, layers of paint and movement of the sea

like beach streams ...


in the last post I talked about drawing on the reverse of the foil instead of embossing
this creates great possibilities for working your own designs

I tried it with really simple pebble shapes to see how it would work out ...


I gave it a colour wash and then painted in some of the pebble shapes
using watercolours / h2o paints ... but zapping with a heat gun between applications

it's interesting and has potential as a technique

above ... I embossed the foil with pieces of real seaweed
before applying watercolour and h2o paints

and finally (with the foil) ... here are my limpets


a 3D piece capturing the texture of the limpet shells
and painting into the foil
(not finished yet ... in progress ... I've still got to add markings with artist pen)

https://www.flickr.com/photos/lovestitchingred/9123508801/in/photolist-


some seaside inspiration from my flickr page and favourite artists / images


I've worked on covering my sketchbook and can now spend a happy afternoon
gluing in my samples for The Surface Treatment Workshop


I look forward to posting the next workshop samples
on Wednesday - experiments with masking tape
thank you for reading and for all kind comments x

Wednesday, 22 February 2017

Surface Treatment Workshop - week 3

a few weeks ago my sister and I decided to work our way through the prompts
covered in the book "The Surface Treatment Workshop"
and already we are on week 3 which explores using aluminium foil ...
the sort of foil most of us have in our kitchen drawer


most of the prompts include embossing patterns into the foil first
before experimenting with colouring the foil

for the embossing part of the exercise I mainly used stencils
and textured surfaces found in my studio such as corrugated card and blister packs


the samples below were embossed with a seedhead stencil
and then coloured with acrylic inks

I only bought the three mixing colours of turquoise, magenta and yellow
and blended them on the foil to create these tones

the inks were quite runny so they don't work with all stencils
but they did sit quite nicely on this one which had enclosed patterns
below is another piece of foil textured with corrugated card, blister pack and leaf stencil


I applied black shoe polish to this one which achieved a lovely "vintage" tone as it dried


I rather like these tones and mixed patterns


in the sample below I embossed the foil with circles from a stencil
added a layer of pva glue, then, after the glue had dried I painted a seascape with acrylics


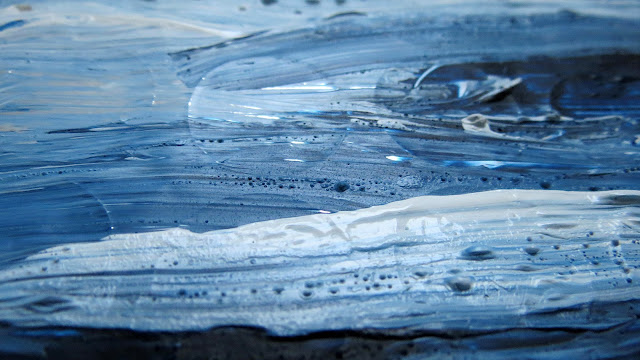
to help the drying process along I heated it with a heat gun which created tiny little texture bubbles
I noticed this was the pva glue bubbling and also the white acrylic, but not the blues


you can see the embossed circles coming through the paint

the close up detail below looks like seagulls and sea foam
(you have to use your imagination a little bit ...)


this is another sample below of the same process but without using the heat gun
and painting into the pva glue while it was still wet

the paint blended with the pva to create a feeling of movement in the seascape
(I definitely prefer this version)


this is the whole scene below ... a landscape


and a detail of the seascape with white sand beach, rolling waves and wintery sky


it's all I had time for this week as I also worked on covering my sketchbook
but I do have a couple more samples in progress which I hope to finish at the weekend

these are ... drawing and mark making on the reverse of the foil instead of embossing

and a 3D piece where I stuck some limpet shells down on a base
covered with aluminium foil to get the shell textures coming through
then I painted the shells white and just need to work more colours into the shells

***

in week 4 we are exploring mark making with masking tape

week 1 - stamping/printing
week 2 - stencils
week 3 - aluminium foil
week 4 - masking tape

my sister didn't enjoy using the foil this week but she did create a lovely original sample using
foil wrappers from stock cubes which she painted with acrylics and oil pastels x