
I got a little behind with the Surface Treatment Workshop last week
I did work on various samples but struggled with my fibro, headaches and asthma
and generally felt under the weather through exhaustion from preparing for Stitch St. Ives
it meant such a lot to me to be able to take part in the show and to meet people
and afterwards I felt I was ok at first but it caught up with me ... so I had to give in and rest
if you follow along ... you will be used to me disappearing without warning now and again
but it is my intention to push through it this year and get back to a working routine in my studio
and this project - The Surface Treatment Workshop - has really helped me
to get in the studio, to develop my art practice and work with new products

we also got a little out of sequence
because, sometimes, we have to order new products in specially
and have to wait for them to turn up in the mail
so you may have noticed that we skipped to week 8 to work with gesso
while we were waiting for gels and fiber paste to arrive
while we were waiting for gels and fiber paste to arrive
for these samples we decided to combine week 7 (gels)
with week 10 (making our own speciality gels)
with week 10 (making our own speciality gels)
as a lot of the prompts for gels were quite similar
and as there were quite a few ideas for using gels I decided to work smaller samples
and created a series of hand made tags to help me contain them

for the tag below I used Golden medium gel mixed with a little gold acrylic paint
to embed tissue paper and paper lace onto a collaged background
I covered the collaged tag with quite a thick layer of transparent matte gel
and added pressed flowers into the gel
the gel acts like a glue and a sealer in one
and after using it to secure placed paper or objects
the excess gel medium can be wiped away for a neat finish
it was a particularly good product to use with the delicate flower petals
and added pressed flowers into the gel
the gel acts like a glue and a sealer in one
and after using it to secure placed paper or objects
the excess gel medium can be wiped away for a neat finish
it was a particularly good product to use with the delicate flower petals

you can see I have applied the gel really thickly on the tag / sample below
using the gel to adhere a green sweetie wrapper and some scrim
I also used the gel to collage a tapestry yarn wrapper
and sprinkled gold mica powder into the wet gel
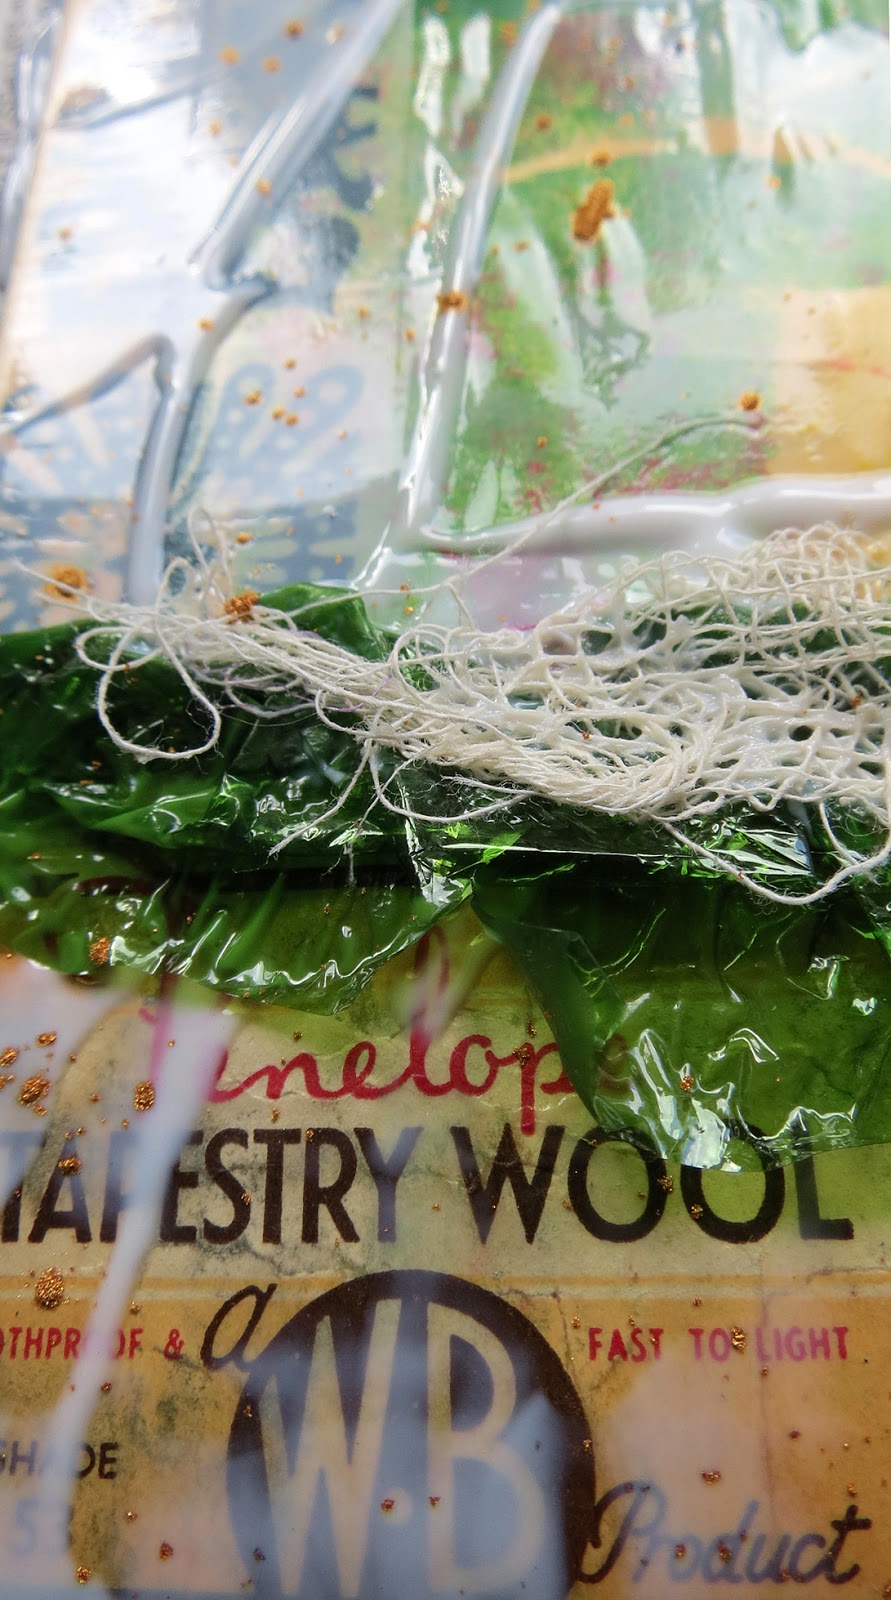
the gel dried transparent and then I added a pressed flower
and you can just make out subtle hints of shimmery mica on top of the tag
and you can just make out subtle hints of shimmery mica on top of the tag

I also discovered that gels over collage (when dried)
make excellent drawing grounds with pencil or artist pen
but we cover drawing grounds next week ... so more on that another time ...

gels can be mixed with paints for colour
and thick molding pastes for extra texture (below)

and here I'm using up excess paint from my palette
mixed into the gel for my tag backgrounds
mixed into the gel for my tag backgrounds
I used a palette knife to apply the paint and gel
feathers embed in gel quite easily and lay nice and flat
and I added an extra layer of gel to seal ... so I could paint over if I wanted ...
and I added an extra layer of gel to seal ... so I could paint over if I wanted ...

now moving on to speciality gels ...
these are really just shop bought textured gels or
hand made gels made by adding "bits" to the gel to create texture
these are really just shop bought textured gels or
hand made gels made by adding "bits" to the gel to create texture
this one below is broken egg shell pieces stuck down with lots of gel
and I also used fine sawdust for one sample

this is Golden glass bead gel below ... a rather fun product to try
Golden glass bead gel looks like quite a runny white / semi-transparent paste
which can be applied as thickly or thinly as you wish ...
it has tiny little glass beads already mixed in ...

as the gel dries it turns transparent but with a sort of wet look
which really enhances the shimmery little glass beads
before it dried out ... I sprinkled mica powder into the gel
and, because it is basically a glue, I embedded a shell and a little piece of lace

in summary I would say gels are a lot of fun to play with
and are useful for layering and acting as a glue and a sealer in one
that's not to say that there may be cheaper products out there that are just as efficient
also this week ... I got some transparent Powertex liquid to play with

it's basically a product that stiffens and hardens fabrics and threads
so that they can be moulded and sculpted into vessels or art forms
I've had my first play with it and created a small bowl
(which, I have to say, I'm not enamoured with)
and I'm not sure I'm all that keen on the smell of Powertex either
but that may be muted when the vessel is painted
however, I have also applied it to this piece of metallic lace
which did interest me greatly for the project I have in mind
I'm looking for a lacy fine art texture with distressed holes and threads
to which I can add some stitched barnacles and/or seaweed for vessels for exhibition

next up ... I will share week 9 - fiber paste samples (by way of catch up)
Evelyn has already posted hers if you would like to see
then we are back on track again
thank you for following along
with the Surface Treatment Workshop


